10 Tips for Building Miniatures & Dollhouses
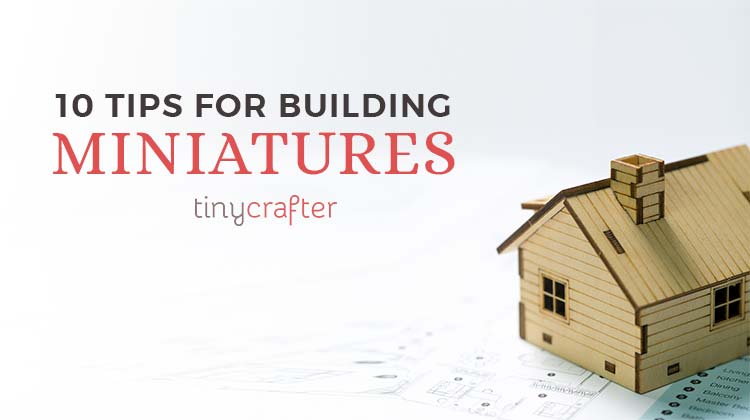
I love building miniatures and over the years I’ve picked up some handy tricks, learned mostly through trial and error and lots of mistakes.
Even with lots of experience, I made a pretty big mistake last week and so today I wanted to share basically a big long list of “Do This, Don’t Do That” and “Things I Learned About Building Dollhouses the Hard Way”.
In theory, building a dollhouse seems simple enough. Start with a box, or glue together some wood or cardboard. Assemble the house and decorate it, right?
It might be easy for some people, but for me it’s definitely not always easy. Even if I have everything planned out or I start with a kit I still end up making mistakes.
This happened to me last week. I built up a very nice paper mache dollhouse base. And then, to my horror, the paper mache clay I made never properly set up. While the materials cost wasn’t very significant, I lost a LOT of time….and then I couldn’t “fix” the problem either.
Fortunately, I learned where I went wrong last week – I accidentally used the wrong kind of glue. {I have 4 giant gallon jugs of various glues…they all look alike if you don’t read the label carefully! Sadly I grabbed the wrong one without realizing it – eek!}.
Without getting into a detailed chemistry 101 lesson about adhesives, let’s just say if you use the wrong glue, your paper mache clay will turn into rubbery slime.
My youngest daughter LOVES all things slime, so I guess I have a good slime recipe for her now, lol…
But when you’re making a dollhouse, and you cover the paper mache with slime…that’s just frustrating.
So, my tips in this article will share everything I know about dollhouses and hopefully it will help you if you are just getting started or maybe looking for ways to make it less work and more fun!
#1. Invest in the Right Tools BEFORE You Start
My goodness, the amount of time I’ve wasted trying to get the right kind of tools for working with miniatures.
Most of the tools I’ve used and found have been through trial and error. I’m not a big fan of big, heavy, noisy power tools or sawdust, so just trying to find a good way to cut wood without investing in a full-blown woodshop was tricky.
The tools don’t need to be sophisticated, or even expensive – but they have to work and you have to have them! Some tools make life a LOT easier, other tools you might spend a lot of money for and never even use them more than once.
Basically, at a minimum, you’ll always need a way to cut things, a way to glue things, and a way to clamp things that are glued together while the glue dries.
There doesn’t seem to be very many guides on “the best tools to use for miniatures” that are updated. So I wrote my own, lol…
You can see the miniature tools I currently use here – and that is a “living list” which means I will update it often!
#2. Know Thy Building Materials
You can build a dollhouse out of paper, you can build a dollhouse out of oak. There are many different building materials for dollhouses and understanding their properties will make your life a LOT easier!
Most people don’t build dollhouses out of oak because that would be VERY heavy and also hard to work with, because oak itself is a very hard wood…and quite literally hard to cut.
Cardboard and paper are nice options, but they aren’t very sturdy. If you’re building a dollhouse for kids that’s not necessarily an heirloom quality piece, cardboard is great!
Still, even with cardboard houses for kids…you need to know how to glue it and how to keep it together. You never know when Barbie or even the cat might want to have a dance party on the roof.
I’ve built houses out of almost everything now, from clay to wood to foam board to paper and even metal. The key to being able to do that is knowing different materials and how to work with them without them falling apart.
See My Post Here: The Miniature Guide to Wood, Paper & Other Building Materials for Dollhouses
#3. Don’t Start With a Complicated House
Before you tackle a complicated house with fancy roof gables and dormer windows and other complex architectural details…I recommend something much easier: room boxes!
Room boxes are basically a box that can be decorated any way you like. If you want to make a bedroom, make a bedroom. If you want to make a kitchen, make a kitchen.
You can also very easily make shadow boxes. Shadow boxes aren’t quite as deep as a room box, but they are fantastic practice and best of all small enough that you won’t get overwhelmed or feel like quitting before you get started.
My favorite thing about roomboxes and shadow boxes is you can later stack them all together if you wanted to make an actual house. This is a great idea if you know you’re going to want to re-decorate often or have a big list of different scenes you want to create.
If you *do* decide to build a house…keep it SUPER simple. One roof angle. 4 walls. And keep it small! No more than 2 rooms total!
You WILL make mistakes, so might as well get some practice in first with something simple!
#4. Make Everything Easily Removable
Some of my earliest mistakes involve painstakingly cutting and glueing popsicle sticks to the floor only to realize about halfway through my popsicle sticks were ever so slightly crooked and as a result looked awful.
Other mishaps involve plastering the walls with joint compound with zero idea how to
Now that I’m wiser and smarter, I’ve learned that for best results, everything should be tested BEFORE you actually try it on the dollhouse!
There is nothing worse than being halfway through a build only to realize something is not going to work!
I recommend if you are new to things like hardwood floors or plastering to practice on a flat surface like a piece of scrap wood first – before you start experimenting on the house itself.
#5. Stick to the Same Scale
Sticking with one scale can definitely help you with the basics of making sure everything fits in a room and that all of your pieces work when they are together.
When I’m building artistic pieces I don’t always think too much about scale, but if you are trying to make your scenes realistic, having a good understanding of scale makes a BIG difference in the final result.
Most of the things I create are loosely based in 1:12 scale. This makes my life a LOT easier, because it allows for me to quickly calculate measurements and create a cheatsheet like I did in my 1:12 scale common furniture sizes printable.
It’s so nice if I want to build a desk to look at my notebook and have the measurements right there ready to go!
#6. Learn About Interior & Exterior Design Basics
Most of us who love the world of miniatures also have some interest in interior design – otherwise we’d probably not be decorating tiny rooms with so much detail!
When I look at different miniature rooms I see online, I’ve noticed that even in miniature scale the same design principles apply as real-life.
Whether you’re making a photo wall or maybe just choosing a statement piece for a room – all of these are things to think about!
There’s a lot of great books and magazines about how to decorate filled with all sorts of tips. Anytime I go to the library I’m always sure to pick up a stack of 25 cent home design magazines – these are great inspiration and a good way to learn basic design tips to give your final rooms a professional look.
#7. Create Patterns
If you are designing your own miniature structures and furnitures, having patterns and building plans will save you a LOT of frustration later!
Making patterns is MUCH easier than having to measure everything out from scratch each time. Figuring out the measurements can be very time consuming, and just “winging it” will give your pieces that authentic “homemade” look rather than the fine “handcrafted” look.
Many of the tutorials I plan to add here come from my own designs and pattern library. Making a pattern for unique pieces with plans allows me to easily recreate anything – and share it with you at the same time!
#8. Be Mindful of Copyright Laws
Copyright is one of those things as an artist that can be very complicated to deal with. The very same copyright that protects our own work can also very much limit us in what artwork and designs we can legally use in our miniatures.
It’s always important when designing something that everything is either your own original work or you use something with permission. Often times “permission” is granted through buying licenses or paying a royalty fee to various copyright and trademark holders.
A good example is our beloved friends Snoopy and Charlie Brown from Peanuts. As much as I’d LOVE to make a Snoopy house or even a miniature for Charlie Brown’s house, in order to do this and ever let anyone else see it, I’d have to get permission from whoever owns the trademark and copyright for Peanuts.
It *can* be done, but it requires a lot of research and typically money. If you don’t have a lot of time or money to pursue licensing the legal way, you’re best off to use royalty-free stock graphics and designs.
Like I said, copyright laws are complicated. You can read more about copyright here.
#9. Be Gentle With Yourself On How Long it Takes…And Give Yourself a Deadline!
It takes a lot longer to build things in miniature than people might expect. Just because the pieces we make are smaller doesn’t always mean they take less time to create!
If I crochet a miniature teddy-bear or poof seat, it’s still the same amount of stitches required for making the real life-size version!
One thing that has helped me SO MUCH in being able to actually complete projects is to create a deadline and have a schedule.
I keep a paper planner where I keep track of my schedule each week and also outline my goals. Giving myself a soft deadline like “have the frame of the house built by the end of the week” allows me to better manage my time around other responsibilities.
As a mom of three kids who are still young and in school, a plan is essential for me. I would never be able to get anything done if I didn’t have a soft deadline along with blocks of time scheduled each week to work on different parts of the house. This is especially true for projects where drying time is necessary!
#10. Make Some Friends Who Love Miniatures!
One of the nicest things about most hobbies is there is always a bit of a community somewhere in the world. This can really help when you want to learn new techniques or are just getting started with the basics.
Many areas also have local miniature shops and clubs that meet regularly. Reaching out and getting involved is a great way for you to learn new techniques AND to stay inspired.
It can also be very fun to swap with friends and attend various miniature trade shows.
If there’s not a miniatures group near you, you can always try to see if there is enough community interest to start one. You never know who you might meet that way!
Making miniatures is a lot of fun and its definitely an addictive hobby! Following these tips will hopefully help you get on the fast track to success – without the frustration or tears that ensue when things don’t go as planned.
Do you have any helpful hints and tips about creating miniatures you would like to share? I’d love to hear what lessons you’ve learned the hard way and your advice for new miniature artists in the comments section below!



I am very new to miniature as a hobby. I like to learn more. I am unable to find your article: The Miniature Guide to Wood, Paper & Other Building Materials for Dollhouses. Please advise. Thanks.
You can find it here – let me know if you have any questions!
A little specific, but when u need to glue something very tiny to a very tiny surface, with only a very tiny dot of glue (& if you’re like me & too impatient to sit there & hold it til it’s dry) then you can use baking soda on super glue and it’s a catalyst that will bond the glue instantly! I was battling with the spindles on a spiral staircase before I learned this neat trick.
That sounds like a great trick Seirra, thanks for sharing it with us!
Hi! I’m pretty new to miniatures but have recently gained an interest in the hobby as I love being creative and am skillful with my hands. Do you have any recommendations for starter projects or tips for beginning? Also, do you prefer the 1:12 scale or have you ever tried using the 1:24? Thanks so much!
H.
Hi H, welcome to the fun world of miniature making! I personally like to work in 1:12 scale just because I don’t know if I have the patience/skill/coordination to do 1:24 scale lol…but there are plenty of nice 1:24 kits I’ve seen on Amazon that I’ve thought about trying.
I recommend as a beginner to start with something VERY simple, as it can quickly become overwhelming. Room boxes are great, could also do a small 1 room house or garden shed. I’ve found a lot of the premade kits are not the greatest of quality {or the ones that are high quality are very expensive!} so I usually build my own houses – I’ll hopefully get some plans up for that soon but my general method is to first make a prototype out of foam board and then cut the pieces out of 1/4 inch plywood.
Let me know if you have any questions along the way – always here to help!
Last year, I made a room box as an anniversary gift for my husband. It was a Victorian parlor. This year, I’m doing the Great Hall of a castle. (The boxes are from Hobby Lobby, for $20.) The tower (former oatmeal box) is covered with paper mache egg carton pieces, then given a dry-brush paint job in gray, terra cotta and white. The granite blocks for the walls are made of Granitex polymer clay.
I just wanted to say hello and thank you for all your info you are sharing. I’ve never done any miniature house/items, but I admire everyone that does. Your kids are extremely lucky they have such talented and organized mom. For the time beeing I will admire all miniature creations online and maybe one day I will find enough courage to dive into miniature world myself.
Hi, I am so glad to find your site. My brother is in a VA facility and he would like to build western minatures. He is looking for a catalogue where he can buy windows and doors. He does not use a computer and he lives 3 hrs away from me. Please advise.
Hi Mary! Miniatures.com has a catalog, so if he were to call them at 800.926.6464 I am sure they’d be happy to send him one! They also have an online catalog: https://www.miniatures.com/eCatalog-Links.aspx
Here’s something I’m puzzling over… I’m recreating my grandma’s kitchen, and there are four walls of cabinets and appliances. How do I make a four-walled roombox and still be able to show all the details and furnishings? I’m guessing hinges somehow? I’d love some advice! Thank you. Shawn
Hi Shawn, hinges are definitely one way to do it! You could start with a basic rectangle/square frame for the room and hinge all 4 walls or you could only hinge 1-2 walls. I’ve seen hinges that are on the bottom of the walls as well as from the sides. Sounds like a fun project!